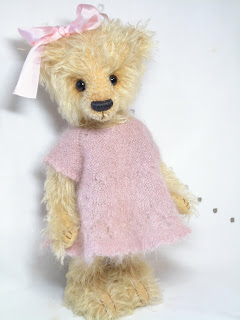
Mohair: 35*50 cm (1/8)
Material for palms and feet (ultrasuede, felt, plush,
any other fabric)
Eyes 12 mm
Disks for securing the legs, 35 mm: 4 pcs
Disks for securing the head and arms, diam. 25mm: 6
pcs
5 strong cotter pins
Embroidery yarn for the nose
In addition, you will need:
Stuffing material: approx. 300 g of fiberfill
or 300 g of sawdust
Granulate of your choice: glass, plastic or mineral
Scissors with sharp points
Forceps
Awl
Needle-nose pliers or cotter key
Threads for sewing parts together, matching the color
of mohair
Needles
Wooden stuffer
Pattern pieces:
ü Body - 2 pieces
ü Head (side) – 2 pieces
ü Head (middle part) – 1 piece
ü Arms – inner part – 2 pieces
ü Arms: outer part - 2 pieces
ü Palms - 2 pieces
ü Legs - 4 pieces
ü Foot Pads –
2 pieces
ü Ears – 2 pieces
ü Tail – 1 piece
Pattern cutting and layout
Start with
transferring the pattern onto sturdy cardboard, then cut out the pattern parts.
Next, lay all the parts on fabric, with the fabric pile direction taken into
account. The pile direction is specified on the pattern with arrows. Outline the parts keeping in mind the need to
leave a 5 mm cutting space; this is not
included in the pattern! Important! The “darts” marked with
dashed lines on the body and head (gusset) pieces are not to be cut out: these
must just be folded and sewn together
Along the lower
seam of all the three parts of the head, a larger cutting space (1.5 cm) should
be left. Double parts (body, arms and legs) should be outlined in their mirror
reflections. All the marks – darts, points of securing the arms and legs, the
place for the tail to be joined, a tack for future joining of the ears,
stuffing holes – must be transferred onto the fabric.
Soles and palms
are cut of a different material (not mohair). The ears should be cut in the
shape of circles, fold them in two taking into account the pile direction and
sew together. Then make a small cut, turn inside out – and here they are: the
ears are ready. I sew ears to the bear’s head after all the other things have
been done, so it is the last thing to do. Make 2 marks on the side parts of the
head for the ears to be secured symmetrically.
The next (and a
very important) stage is cutting the fur along the margins with small scissors.
You may use any scissors with sharp points, yet the lighter they will be, the
less weary for your fingers it will be. When trimming the pile, avoid damaging
the base of the mohair. Though this is a somewhat tiresome process, do not
ignore it: it will make your seams look much
neater.
Sewing parts together
First of all,
sew together the darts at the middle part of the head, notch them and lay
apart. The same with the body darts: sew together, notch and lay apart. Lay the
side parts of the head together and, having pinned them, make a “chain” seam:
this is very strong, indeed. Before we insert the middle part of the head, we
first tack it with a blanket stitch, then sew with small stitches of the
“chain” seam moving from the nose to the base of the neck.
Tail.
Sew together the parts of the tail, turn inside out, add a bit of granulate, if
necessary.
Body.
The marks for fastening the limbs are made with a contrast color yarn: these
are the points where the bear’s arms and legs are to be attached. This will
make it possible to avoid asymmetry and attach the arms and legs easily at
appropriate places. Before sewing the body parts together, place the tail to
the marked location, pin the parts and sew them with the same “chain” seam.
Larger parts, like the body and the limbs, may be machine-sewn, with a 2-2.5 mm
long stitch. On the back, according to the marks, a hole must be left for
turning inside out and stuffing. As for the bear’s head, I always sew it up on
hands.
Arms.
Sew the inner parts of the arms to the palms, then fold the inner and outer
parts of the arms, fix them with pins, with a hole left for stuffing.
Legs. Sew the inner and outer parts of the legs together leaving a hole for stuffing. Then tack the sole with a blanket stitch from the heel towards the toe on both sides and sew finally with the “chain” stitch.


Комментариев нет:
Отправить комментарий